![]()
INTRODUCTION
![]()
IAN MARCHANT'S HELMET
![]()
HELMET
![]()
SHOULDER ARMOUR
![]()
GLOVES
![]()
ARM ARMOUR
![]()
BELT AND CODPIECE
![]()
KNEE PADS
![]()
BOOTS
![]()
LAWGIVER AND HOLSTER
![]()
PAINTING
![]()
FINISHED
![]()
CONVENTION PHOTOS
HOW TO BUILD A JUDGE DREDD COSTUME
BY KEVIN GOLDSMITH
BOOTS
I tried obtaining some actual biker's boots, but all the offers were just too expensive at least �40. I tried using my Wellington boots but just ended up destroying them. I was told that you could obtain German officers boots - which came up to just below the knee for �25 in London. I also tried Oxfam but the shop was shut. But in the end I thought sod it, and got out my father's wellies. They needed some repairs but Superglue soon put that right. I salvaged what I could from mine and Superglued these pieces to the tops of my Dad's - one pair of knee length boots! I then drew two lines down the front of each boot and cut along these lines, so that I ended up with two large tongues (like you get on standard lace-up shoes). These tongues would be pushed inwards so that the boots fitted tighter to my legs.
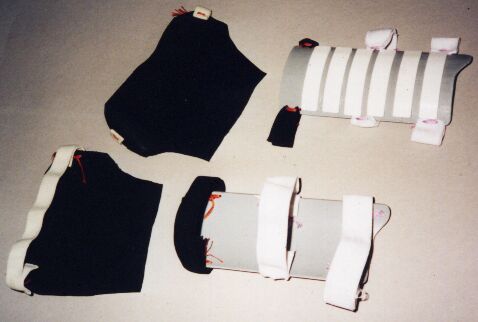
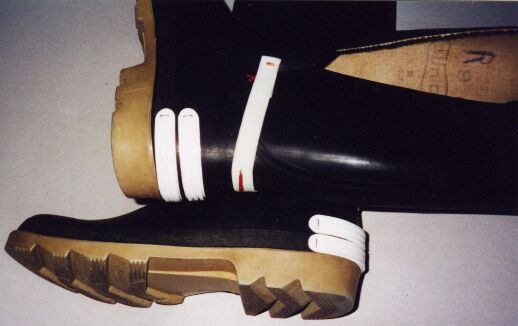
For the shin guards, I remembered seeing a length of drain pipe half, which Dad had used in the 70's to make a rain water collector for a water butt system. I sawed an 8 inch length off this, and then cut that in half. I shaped the tops of these pieces like the ones in the photo. I then cut 12 lengths of styrene 15mm wide by 72mm long, and Superglued 6 of these to both pieces, after which I drilled 6 holes (in groups of 2) down each side, and sewed 3 pieces of elastic to the two structures - one set of shin guards.
For the pieces that cover
the upper part of the actual foot I cut 2 pieces of leather this
shape: ![]() and sewed some lengths of bra strap elastic to each
of them, and to hold everything in place, the bra elastic was
sewn to the boot just above the heel to stop it from riding up.
and sewed some lengths of bra strap elastic to each
of them, and to hold everything in place, the bra elastic was
sewn to the boot just above the heel to stop it from riding up.
To make the 2 strips that go around the back of the heel, I cut 4 pieces 15mm wide by 72mm long, drilled two holes in each end, drilled 2 holes in the corresponding areas of the heel, carved and filed the ends round, bent the strips into a horseshoe shape, and attached them to the heels using 1 inch-long lengths of bared, green garden wire, like staples. To these strips I added a further three 7mm wide strips, which were Superglued on.
For the 'steel' toe caps, I first of all cut 2 strips 1/2 inch wide and 6 inches long and drilled 6 holes in each - two in the middle and two at each end, and attached them to the boot like the heel. For the eight 'rivets', I Superglued on some plastic knobs from my bits box. I then added the side pieces, then the top, which had to be bent slightly, followed by the front piece, all of which was carefully trimmed. For the pieces that stick out at the front and sides, I used two pieces on each section, gluing them one on top of each other. The front ones were done first, then the side pieces. The side pieces were cut to shape to fit the toe cap first, glued, then trimmed. For the pieces that go on top of the cap I cut 12mm wide strips to fit the top area and then did the same for the side pieces. This was again trimmed. Lastly I filed and sanded where necessary.
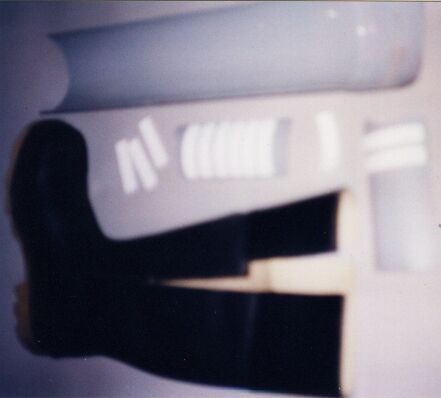
(1) Shows additions to boots, plus shin guards made from drain pipes and strips of styrene. Sorry about the quality of the photo but I think it is clear enough.
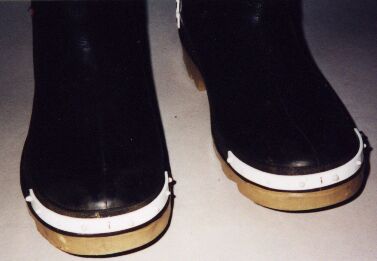
(2) Clearer view of shin guards, as well as top of shoe leather covers.
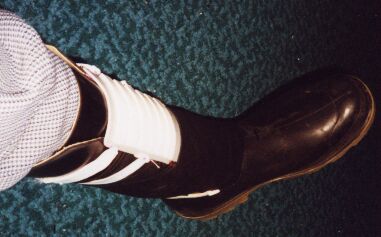
(3) Boot on leg complete with shin guard and shoe covers dead centre of photo.
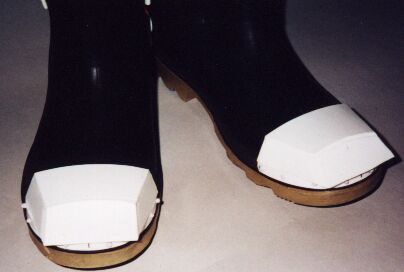
(4) Heel detail. Shoe cover strap can also be seen.
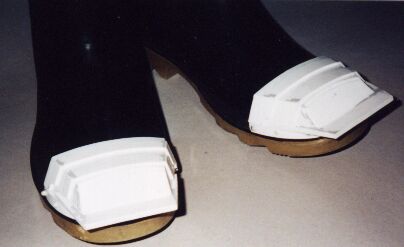
(5), (6), (7) Building up the toe-cap detail.

(8) Better detail of shin guards.
![]() Judge Dredd and 2000 AD © Rebellion A/S 2008.
Judge Dredd and 2000 AD © Rebellion A/S 2008.
BARNEY is a fan site by
based on 2000 AD Online 2001-2008.